
I still remember the first time I realized Peppermint Bark didn’t have to be a total sugar bomb to enjoy. It was a chilly December afternoon, and I was in my little kitchen working on holiday treats for my family. Usually, I’d feel a bit overwhelmed trying to balance that festive sweetness with the nourishing ingredients I want to bring to our table. But that day, I stumbled on a Peppermint Bark recipe that combined the fresh, bright flavor of peppermint with a bit of chocolate goodness—without the overload of artificial ingredients or crazy complicated steps.
That moment changed everything for me about how I approach this beloved holiday snack. Instead of it being a rare, indulgent exception, homemade peppermint bark became something I could feel good about having on hand—whether for a quick snack, a cozy coffee break, or even a thoughtful gift for friends. It fits perfectly into a balanced, real-life eating style where there’s no stress about perfection, just simple, feel-good food. The peppermint flavor feels so refreshing, and the chocolate hints satisfy that sweet tooth without sending me off track.
I’ve since tried so many varieties of peppermint bark, tinkering with peppermint bark ingredients and using methods that keep it straightforward and nourishing. It’s turned into a go-to recipe for weekends and even casual weeknights when I want something comforting but still light and fresh. If you’ve been curious about how to bring peppermint bark into your kitchen without fuss or guilt, you’re in the right place. I’d love to share what I’ve learned to keep this treat delicious and doable—perfect for fellow home cooks looking for a simple, nourishing holiday peppermint bark recipe they can return to again and again.
What I appreciate most is how adaptable homemade peppermint bark can be for different tastes and needs. Whether you’re craving chocolate peppermint bark or a lighter, holiday peppermint bark twist, there’s room to make it your own. My hope is that by the end of this, you’ll feel just as excited—and equally relaxed—about making peppermint bark part of your kitchen routine.
What You’ll Need:
For this Peppermint Bark, I keep the ingredient list simple — because good food doesn’t need to be complicated or expensive.
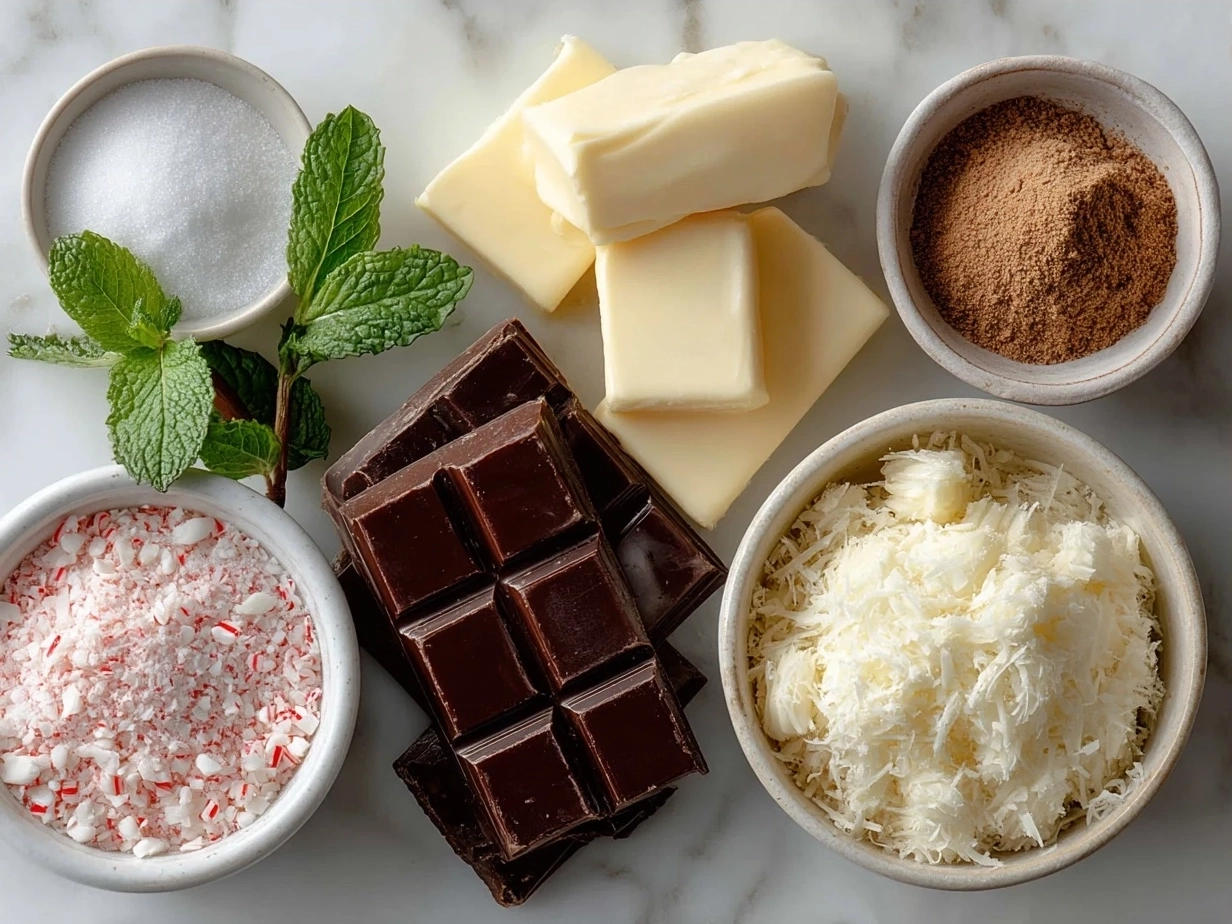
- 8 ounces bittersweet or semi-sweet chocolate chips (If you want a more intense flavor, go for dark chocolate. Don’t worry if you only have milk chocolate on hand; it will still work beautifully in this Peppermint Bark.)
- 8 ounces white chocolate chips (No stress if you don’t have these. I’ve swapped in yogurt-covered pretzels before for a fun twist on the peppermint bark ingredients.)
- 1 teaspoon peppermint extract (You can find this in the baking aisle. It’s the star that gives your homemade peppermint bark that classic minty pop.)
- Crushed peppermint candies or candy canes, about ½ cup (If you’re skipping sugar or want a softer texture, crushed freeze-dried peppermint or mint leaves can work too!)
- Optional: pinch of sea salt (Just a touch to balance sweetness — totally optional but I love it.)
This Peppermint Bark keeps costs low by using basic staples that you probably already have or can find in any regular grocery store. One kitchen tip I’ve found handy is to crush peppermint candies inside a zip-top bag with a rolling pin so it’s quick and mess-free.
If you’re prepping this for a busy day, you can melt the chocolates in the microwave in short bursts to save time. When you store leftovers, keep your Peppermint Bark wrapped tightly in the fridge, and it’ll stay nice and crisp for up to two weeks. I love adding a little extra peppermint extract to the white chocolate layer sometimes when I’m feeling fancy.
Let’s Make It Together!
Ready to dive in? Making peppermint bark is easier than it looks, and I’ll be here walking you through every step, side-by-side.
- Line a baking sheet with parchment paper. This is your Peppermint Bark’s cozy little home while it sets.
- Melt the semisweet chocolate chips. I usually do this in a microwave-safe bowl, heating in 20-second bursts and stirring in between. That way, you don’t risk burning your chocolate. Your peppermint bark should start smelling like a cozy chocolate dream by now.
- Pour the melted chocolate onto the lined baking sheet, spreading it evenly with an offset spatula or the back of a spoon. Don’t stress if your layer isn’t perfectly even—Peppermint Bark has a rustic charm!
- Pop it in the fridge for about 10-15 minutes to set this first chocolate layer. While you wait, it’s a perfect time to clean up your space or prep a warm drink.
- Next, melt the white chocolate chips the same way, stirring until smooth. Stir in the peppermint extract carefully here—that fresh hit is what really brings this holiday peppermint bark to life.
- Pour the white chocolate on top of the semi-sweet layer, and gently spread it to cover. Work quickly but gently—the white chocolate sets fast.
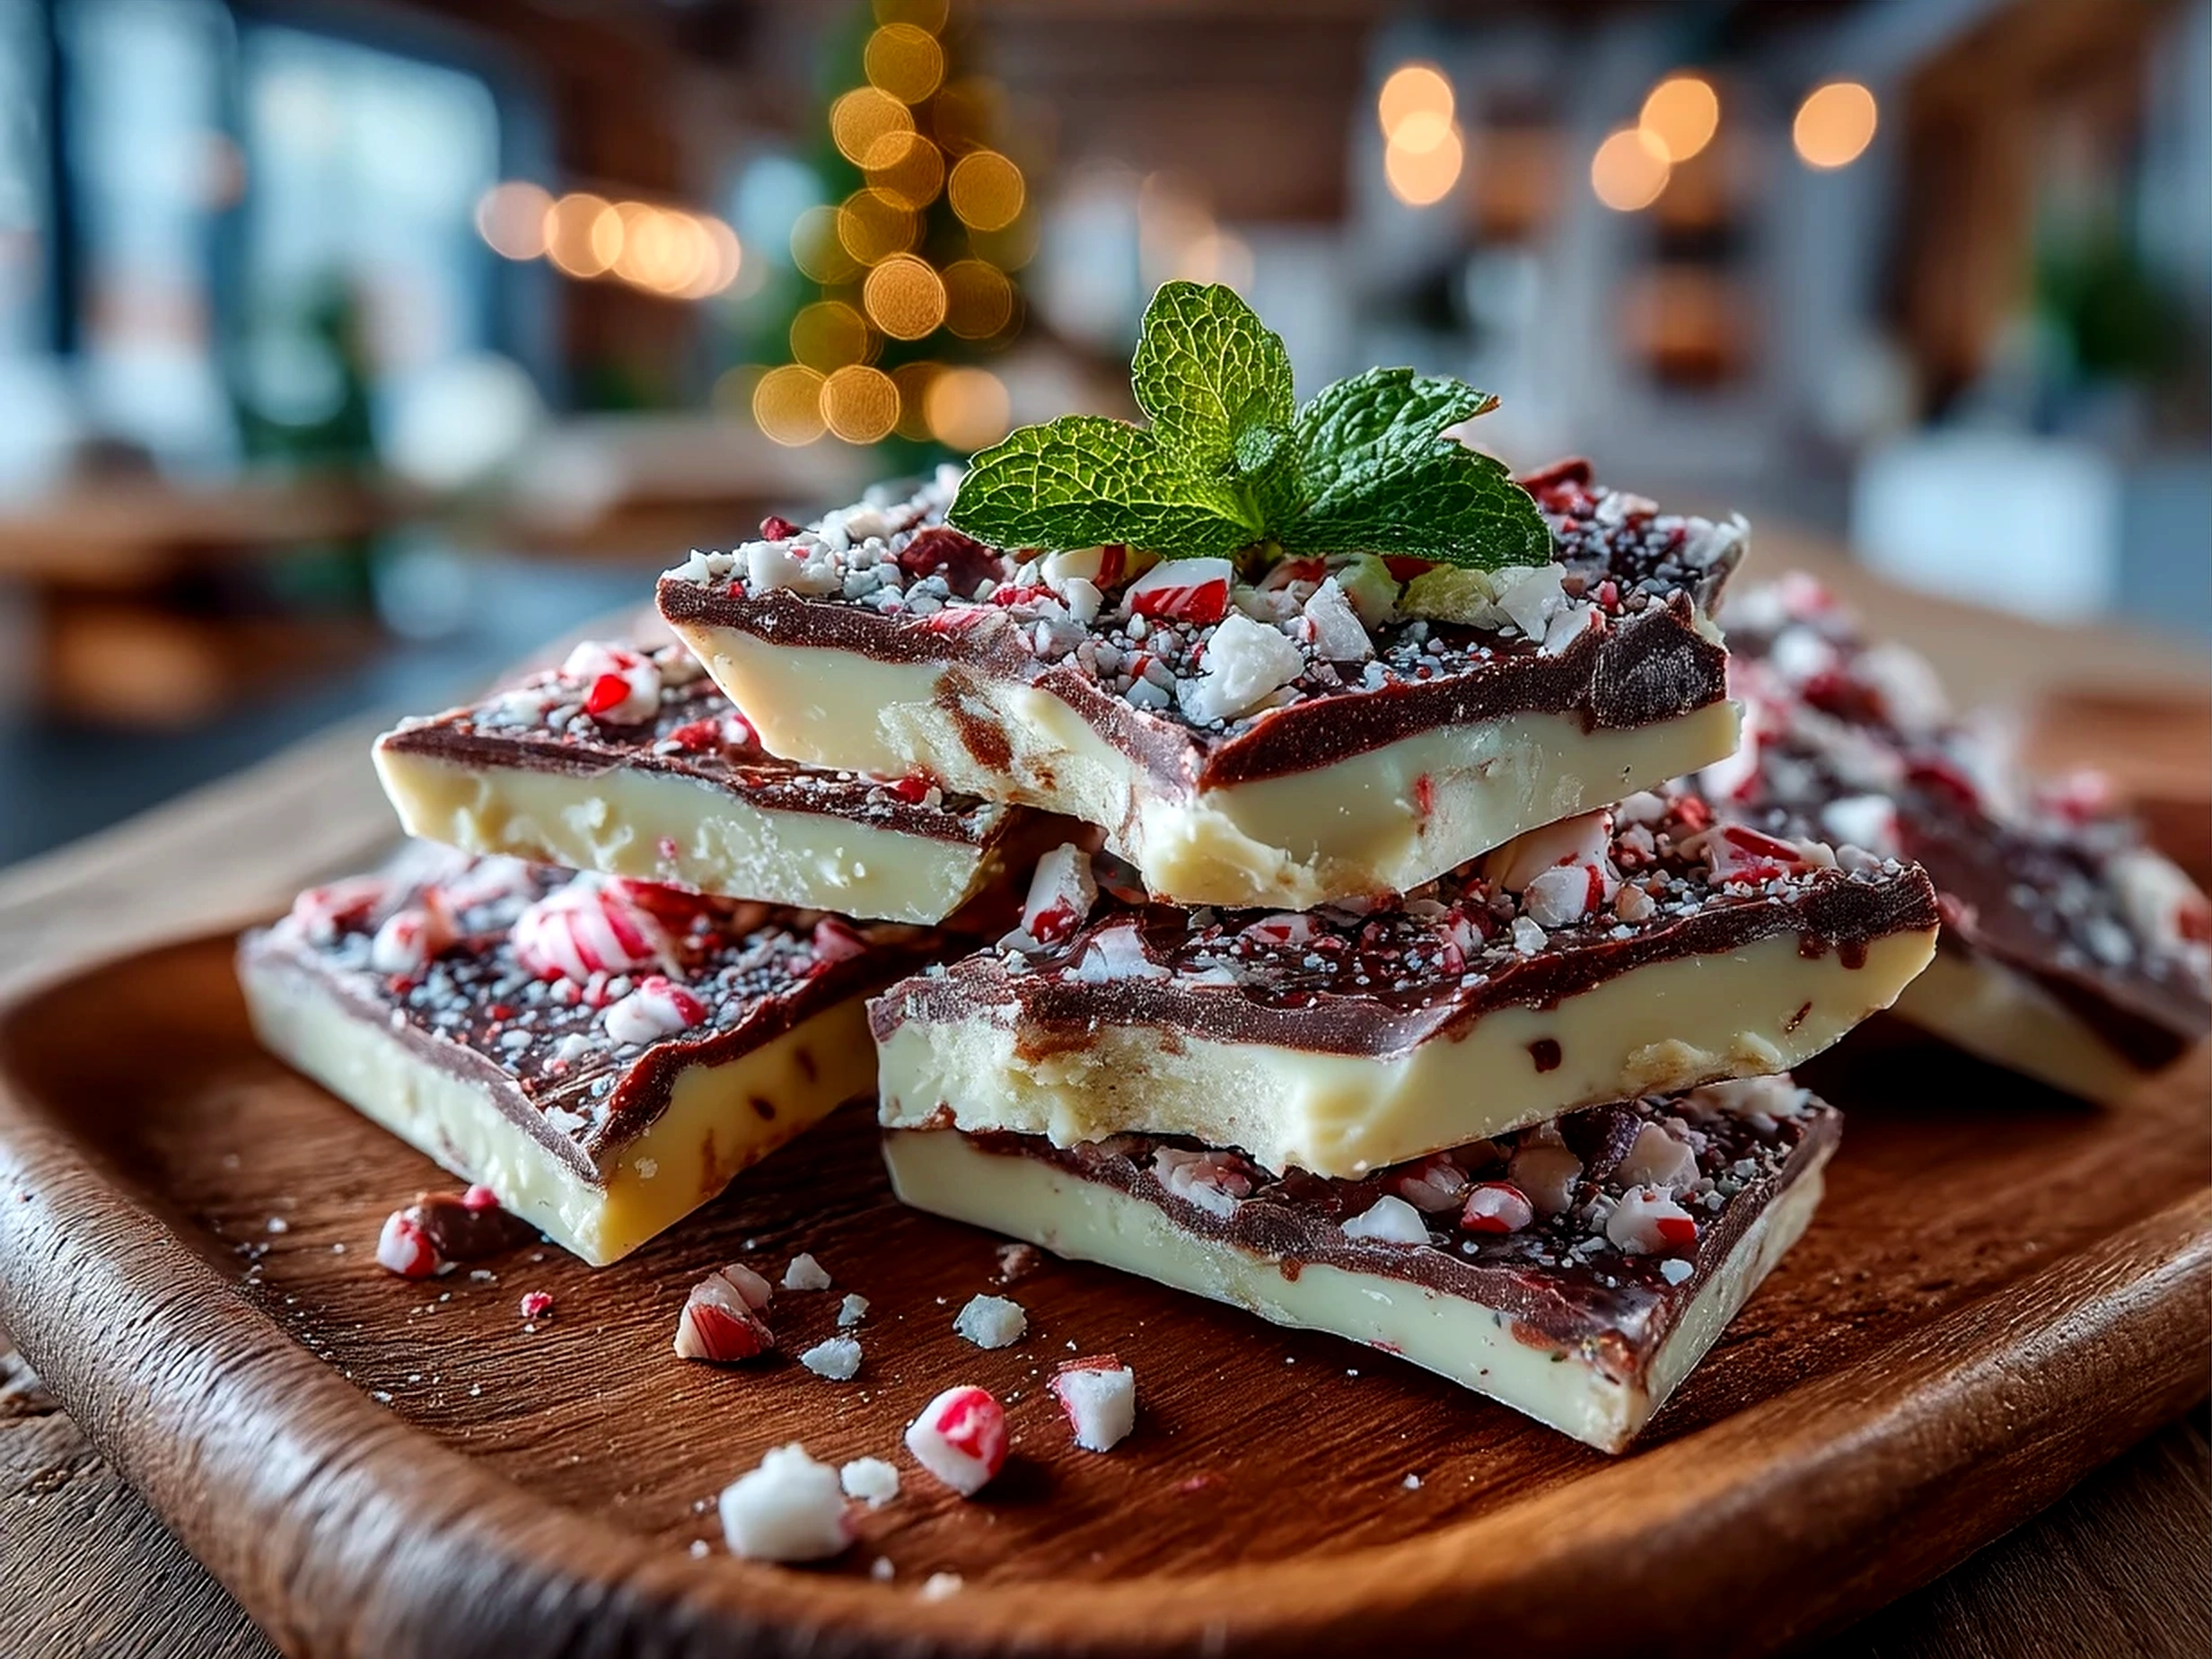
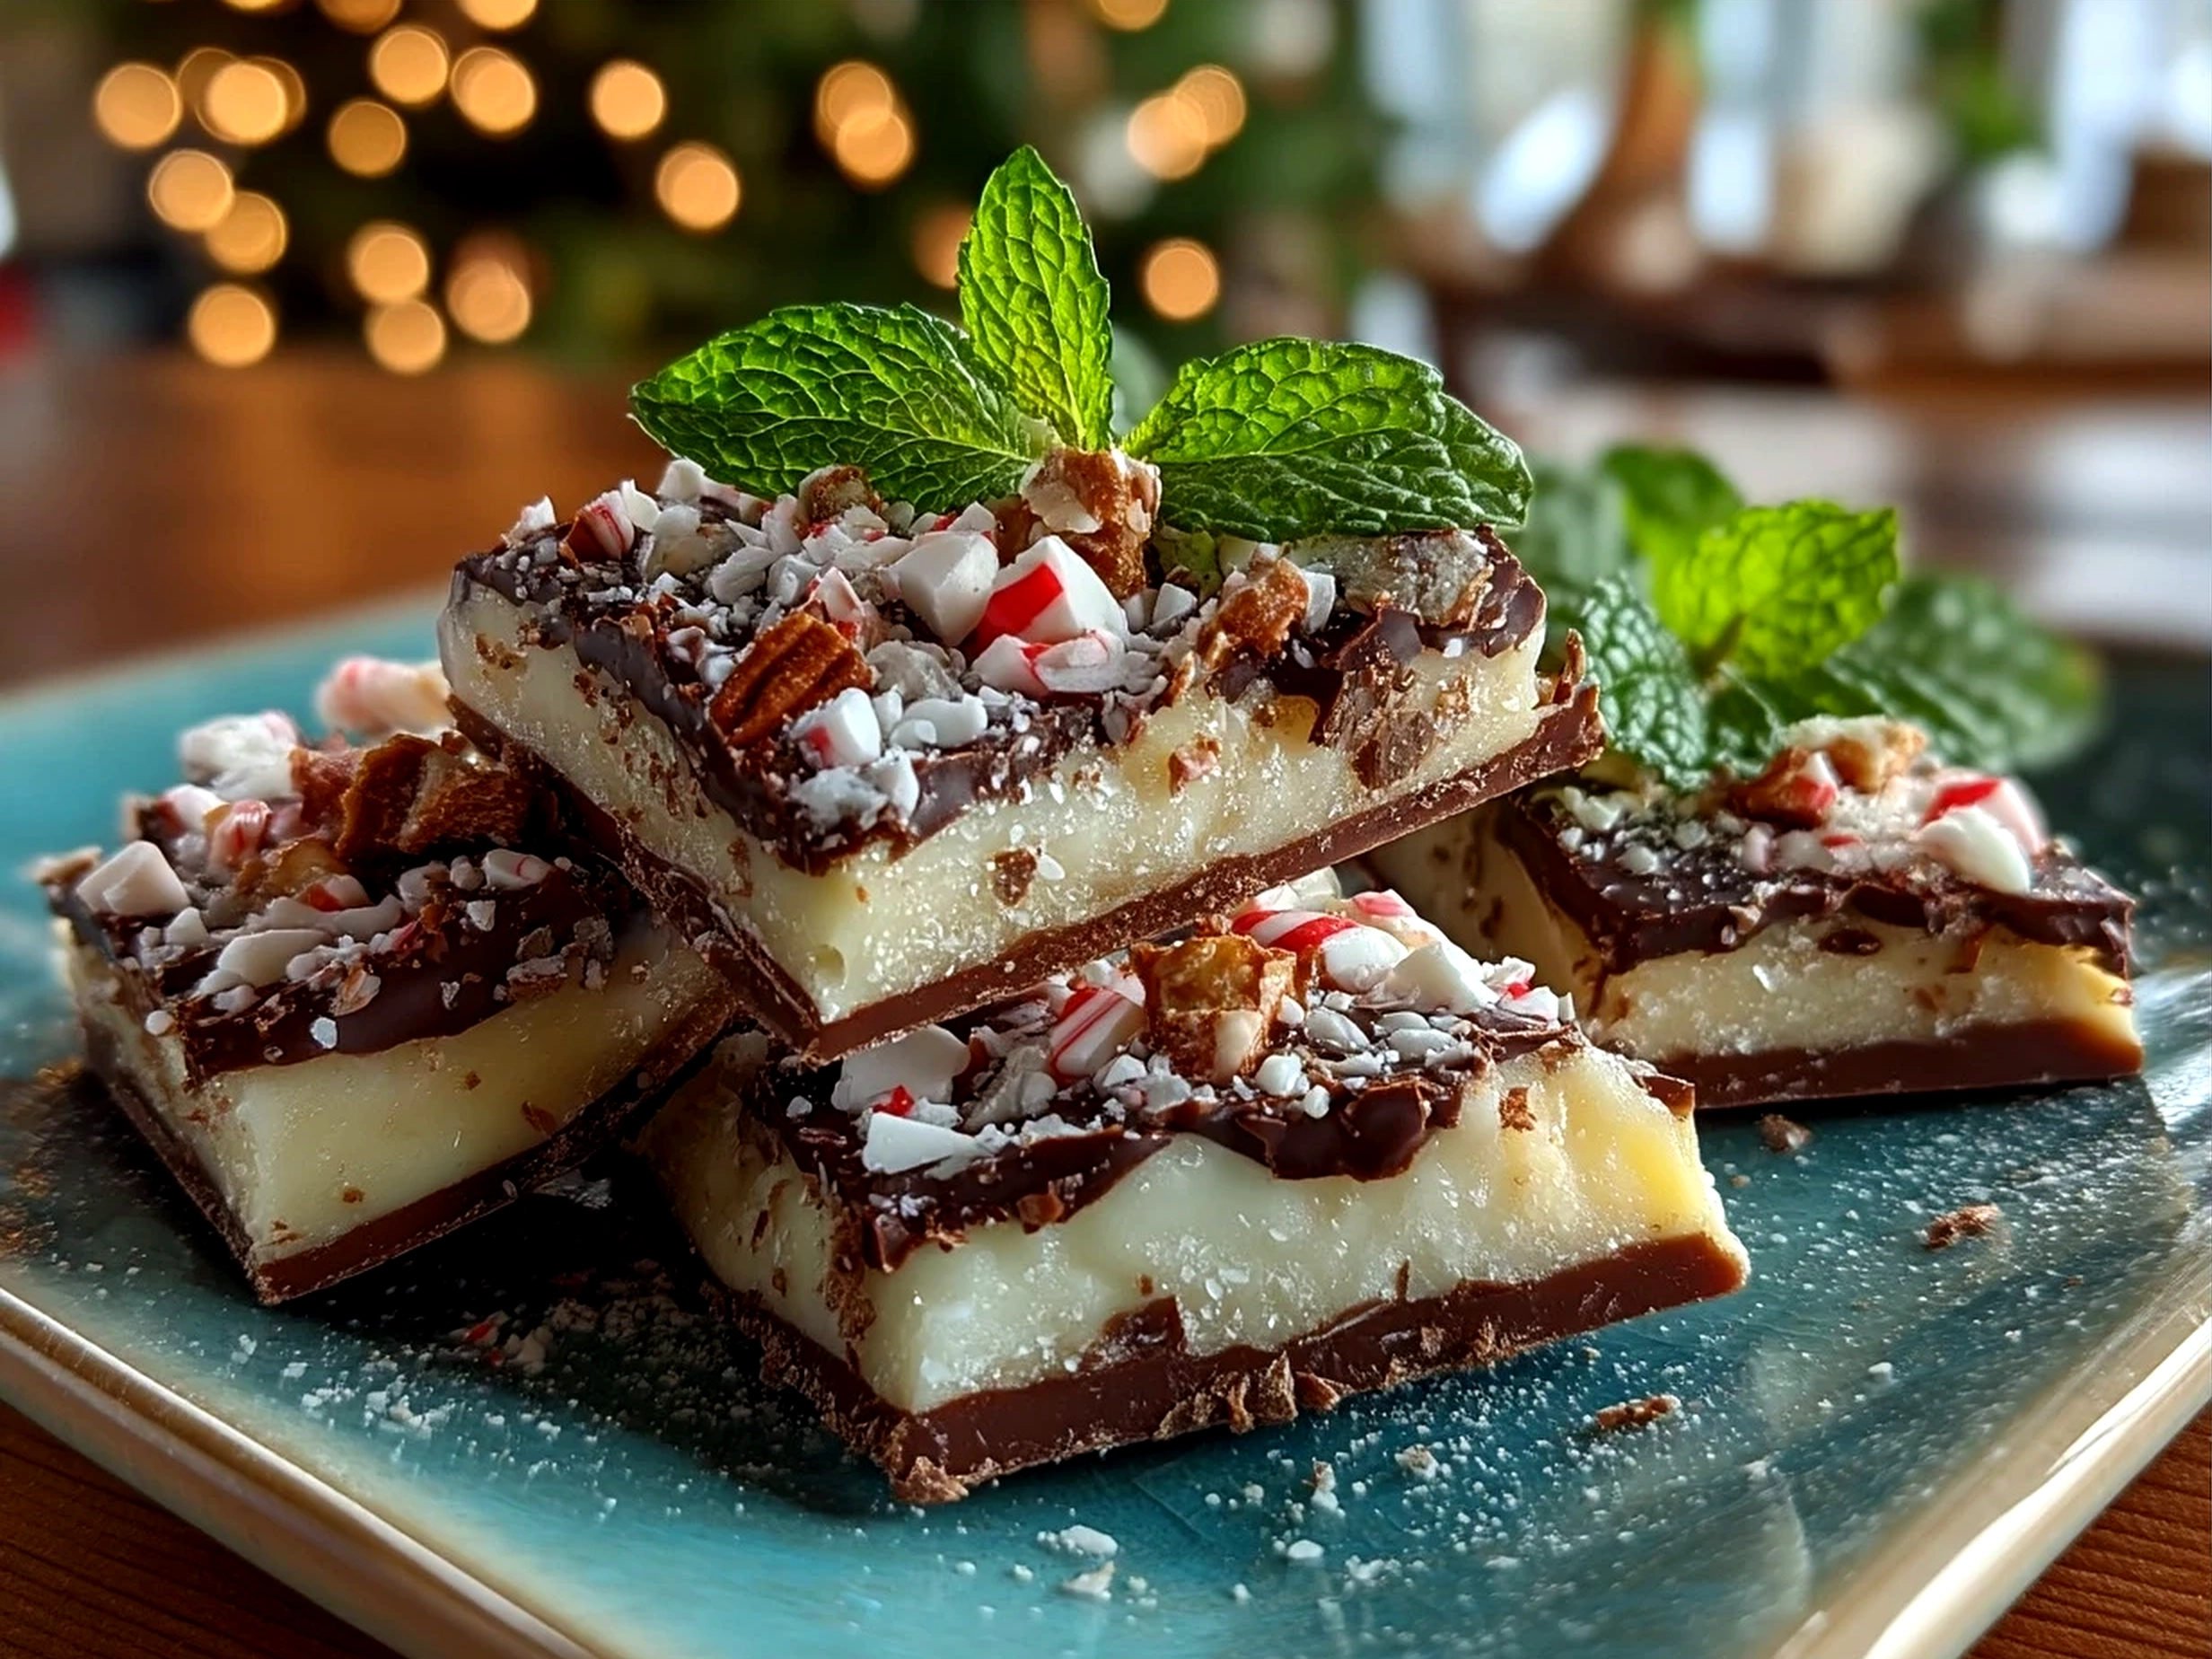
- Sprinkle the crushed peppermint candies evenly over the top while the white chocolate is still soft. You’ll get that perfect crunch and bright flavor with each bite.
- Chill your peppermint bark for at least 30 minutes, or until fully hardened.
- Once set, break the bark into pieces with your hands for a casual, homemade feel. Don’t worry if your peppermint bark looks a little rough around the edges—this is charm, not flaw!
Here’s where I used to overcomplicate my peppermint bark with extra steps that weren’t totally necessary. Turns out simpler is better, and it’s less stressful for real-life cooking. If you want to speed things up, you can spread the peppermint bark on a square or rectangle pan, which makes cutting into pieces easier and less rustic.
How I Love to Serve This!
This peppermint bark has become my go-to treat for everything from a cozy afternoon snack to a festive gift. It pairs beautifully with a warm cup of peppermint tea or even a hot chocolate with a splash of cream. Sometimes I serve it alongside fresh fruit or a light salad when I want a bit of sweet on the side without overdoing it.
For quick entertaining, I love arranging the peppermint bark pieces on a festive plate with simple garnishes like fresh mint sprigs or a dusting of powdered sugar. It looks adorable and feels extra special. Leftovers? They turn into delightful holiday snack packs perfect for a midday pick-me-up.
This peppermint bark recipe really shines for holiday gatherings but works just as well in the middle of winter when you crave that minty, chocolaty boost. Friends and family always seem genuinely impressed, especially when I tell them it’s homemade and made with nourishing ingredients. If you enjoy this, you might love my recipes for Peanut Butter Pie or even something savory like Chinese Pepper Steak—both easy, satisfying, and perfect for any time of year.
Common Questions Answered
I’m often asked if you can make this peppermint bark ahead for meal prep. Absolutely! You can prepare peppermint bark up to two weeks in advance, just store it in an airtight container in the fridge. It stays fresh and crunchy that way.
What if you don’t have all the peppermint bark ingredients on hand? No worries—chocolate chips can be swapped for chopped chocolate bars, and peppermint extract can be replaced with a little vanilla with crushed mint candies for flavor. I’ve done this remix often!
Wondering how to adjust the flavor? If you prefer less peppermint, start with half a teaspoon of extract. You can also experiment with adding a hint of orange zest to the white chocolate layer for a subtle twist I love. Some flavoured salt sprinkled on top works too.
Can you skip the crushed candies? You sure can—try topping with chopped nuts or coconut flakes for texture instead. Homemade peppermint bark is so flexible.
Is there a way to make this vegan or dairy-free? Yes! Use dairy-free chocolate chips and be sure your peppermint extract is pure (some have alcohol). The peppermint flavor is easy to keep joyful with these swaps.
Can peppermint bark melt easily? Keep it chilled and avoid leaving it in warm spots. If it softens, pop it back in the fridge for a few minutes, and it’ll firm right up.
How long does homemade peppermint bark last? If stored in an airtight container in the fridge, it’s good up to two weeks. Just bring it to room temp before serving for the best texture.
Are there easy shortcuts? Melting chocolate in the microwave is my favorite shortcut. Also, skipping homemade candy crushing by using store-bought peppermint pieces can save time!
For more simple, nourishing ideas, check out this Peppermint Bark Recipe – Sally’s Baking or Homemade Peppermint Bark Recipe (4 Ingredients) | The Kitchn. Pioneer Woman’s Best Peppermint Bark Recipe also offers a lovely spin on the classic that you might enjoy.
Final Thoughts
This peppermint bark is a staple in my kitchen because it’s simple, satisfying, and fits right into real-life cooking without added stress or fuss. It’s a treat that feels special but is easy enough to make whenever the craving hits.
My Favorite Peppermint Bark Tips:
- Less is more: Keep the toppings simple to highlight the peppermint and chocolate balance.
- Chill well: Patience while setting makes all the difference to a crisp, clean bark.
- Use quality chocolate: The flavor really shines through the chocolate you choose.
I’ve tried some fun variations, like swapping dark for milk chocolate, adding orange zest, or layering with crushed nuts. My go-to is always the classic chocolate peppermint bark with just the peppermint candies on top. You can always make it your own and find the version that feels just right.
If you decide to try this, I hope you find the same joy and balance I have—to savor a treat that’s both nourishing and festive without the fuss. Cooking peppermint bark doesn’t have to be about perfection, but about enjoying the process and sharing delicious moments with those you love.
For even more simple, nourishing recipes that fit into your busy life, don’t forget to check out my Cake Mix Cookies. And if you’re in the mood for savory, my Chinese Pepper Steak recipe is ready for you too.
You got this, friend—happy peppermint bark making!
Peppermint Bark

Peppermint Bark is a festive, no-bake treat featuring layers of rich dark and white chocolate combined with crunchy crushed peppermint candies, perfect for holiday gifting or snacking.
- Prep Time: 10 minutes
- Cook Time: 0 minutes
- Total Time: 40 minutes
- Yield: 12 servings
- Category: Dessert
- Method: No-Cook
- Cuisine: American
Ingredients
- 8 oz dark chocolate, chopped
- 8 oz white chocolate, chopped
- 1 cup crushed peppermint candies
- 1/2 tsp peppermint extract (optional)
Instructions
- Line a baking sheet with parchment paper.
- Melt the dark chocolate in a heatproof bowl over simmering water or in the microwave, stirring until smooth.
- Stir in peppermint extract if using, then spread the dark chocolate evenly over the prepared baking sheet.
- Place in the refrigerator for about 15 minutes to set.
- Melt the white chocolate using the same method.
- Spread the melted white chocolate evenly over the set dark chocolate layer.
- Sprinkle crushed peppermint candies evenly on top while the white chocolate is still soft.
- Refrigerate for at least 30 minutes or until fully set.
- Break into pieces and serve or store in an airtight container.
Notes
For extra festive flair, drizzle additional melted dark chocolate over the top before adding peppermint candies.