
I still remember the first time I whipped up No-Bake Red Velvet Snowball Truffles. I was mid-week, craving something sweet but without diving into a big baking project. Honestly, I wasn’t sure if something that felt indulgent could also fit into everyday balance without stress. But hey, these little red velvet dessert balls surprised me—they’re creamy, comforting, and so easy to throw together, making them feel like a win in my usual kitchen routine.
These No-Bake Red Velvet Snowball Truffles became my go-to dessert when I wanted to treat myself without the fuss of an oven or a long ingredient list. They show up on my table when friends drop by unexpectedly or when I’m just sneaking a sweet bite after dinner. What I love most is that they don’t come with complicated rules or guilt. Instead, they fit perfectly into the rhythm of real life, offering something nourishing but still delicious and fun.
If you’re someone who loves easy holiday truffles or simple dessert ideas that don’t skimp on flavor, these cream cheese truffles are a gentle way to enjoy red velvet in a bite-sized, approachable form. I’m all for relaxing in the kitchen while still feeling good about what I’m eating, and these snowball truffles check that box every time.
So, if you’re craving a red velvet dessert ball that feels like a little celebration but without stress or hours of prep, let’s get cozy and dive into these No-Bake Red Velvet Snowball Truffles together. I promise you’ll find a simple, feel-good treat here that’s easy to make and even easier to love.
What You’ll Need:
Here’s my favorite No-Bake Red Velvet Snowball Truffles ingredient list. It’s intentionally simple—because good food doesn’t need to be complicated. You’ll need:
- 1 cup red velvet cake crumbs (You can make your own from a boxed mix or grab some from the bakery section. No stress if you don’t have red velvet cake crumbs—I often use plain cake crumbs with a teaspoon of cocoa and a bit of red food coloring for color in my No-Bake Red Velvet Snowball Truffles.)
- 8 ounces cream cheese, softened (This is the magic that makes these cream cheese truffles so indulgently creamy. You can swap in mascarpone if you want a richer touch.)
- 1/2 cup powdered sugar (For sweetness without grainy texture; you can find this in the baking aisle.)
- 1 teaspoon vanilla extract (Adds a lovely depth to your truffles.)
- 1 cup powdered sugar, for rolling (This little step helps create those classic snowball truffles, dusting them in pure white.)
- Optional: white chocolate chips or finely chopped nuts, for rolling

Shopping tip: You can find most of these in the regular baking aisle, and I love how this No-Bake Red Velvet Snowball Truffles keeps costs low by using pantry staples you might already have.
If you’re short on time, grab pre-made cake crumbs or even crushed red velvet cookies for a shortcut. Store any leftover No-Bake Red Velvet Snowball Truffles in an airtight container in the fridge; they keep well for up to a week, which means you’ve got a sweet nibble ready whenever the craving hits.
Let’s Make It Together!
Ready for the fun part? Making these No-Bake Red Velvet Snowball Truffles usually takes about 20 minutes from start to finish, not counting chilling time. Here’s how we roll:
- Start by combining your softened cream cheese and powdered sugar in a mixing bowl. Use a hand mixer or just a strong spoon to get it smooth and creamy. Your No-Bake Red Velvet Snowball Truffles mixture should feel fluffy and sweet at this point.
- Add in the vanilla extract, mixing until combined. This little splash gives your truffles that classic flavor twist.
- Gently fold in the red velvet cake crumbs. Take your time here — you want an even mix but still a bit of texture. If your mixture looks a little crumbly at first, that’s okay; it will come together.
- Pop the bowl in the fridge for about 10 minutes. This is perfect time to set the table or prep a simple side. Chilling helps the mixture firm up so it’s easier to shape.
- Once chilled, scoop out small tablespoon-sized portions and roll them into balls. Don’t worry if your No-Bake Red Velvet Snowball Truffles look a bit uneven — the charm is in their homemade look!
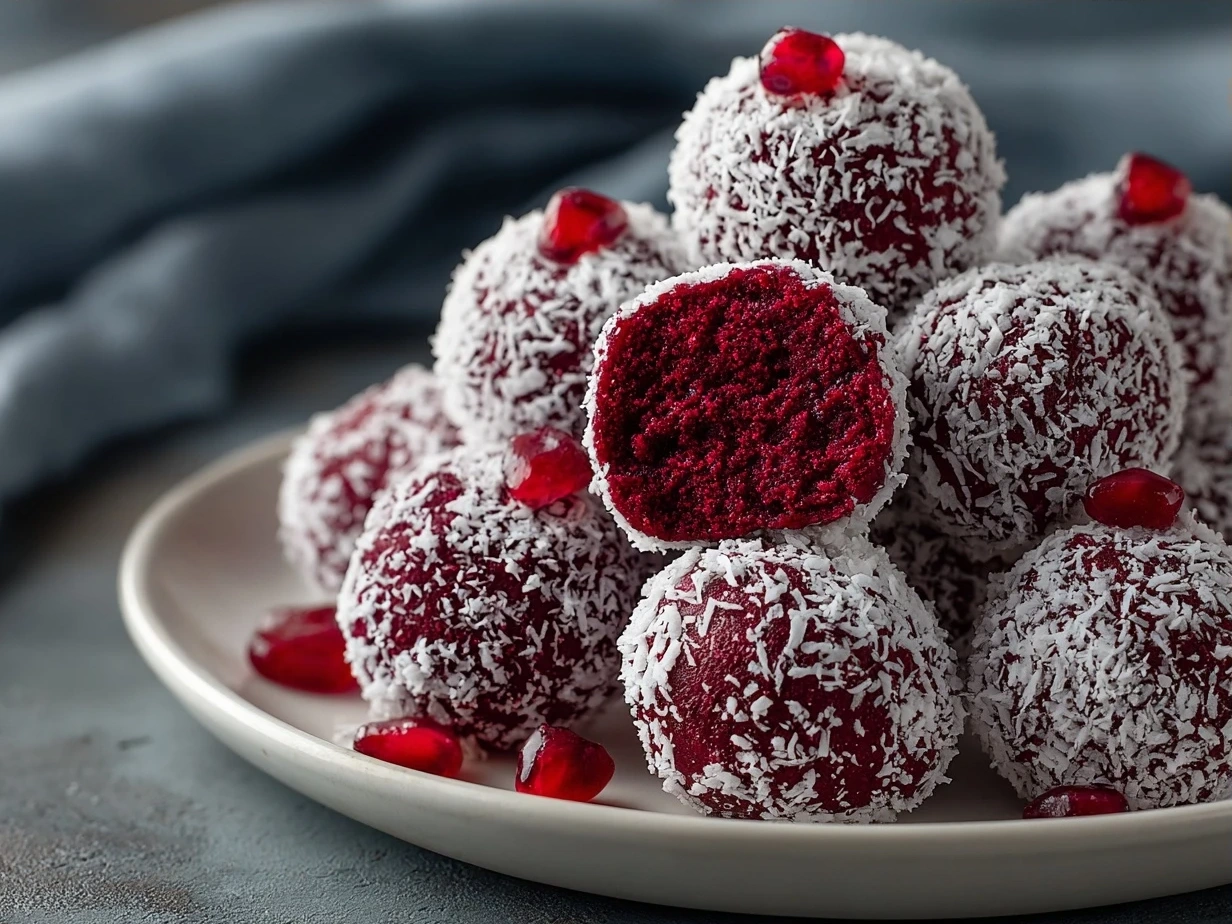
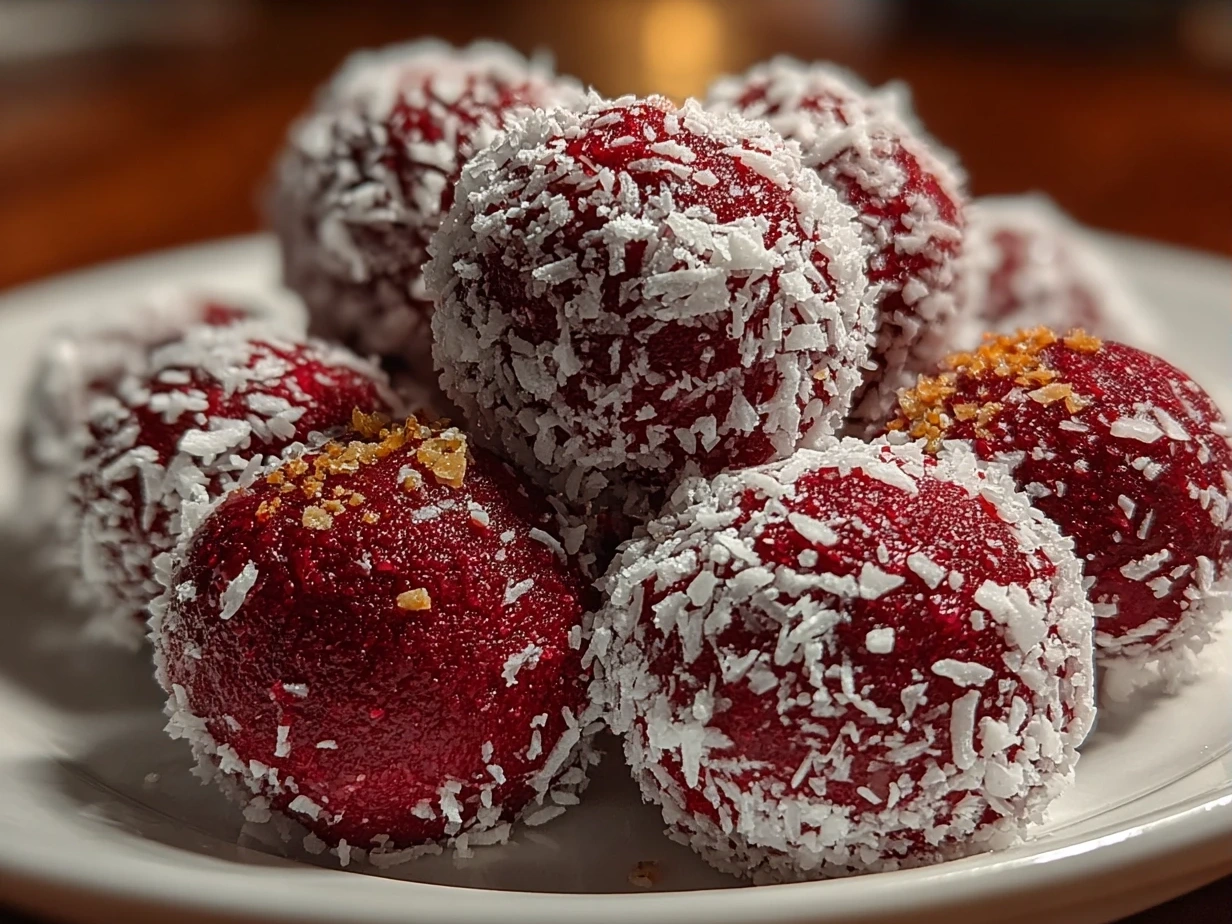
- Roll each ball in powdered sugar until fully coated. This step creates the signature snowball effect and gives a pretty finish.
- Place the truffles on a parchment-lined tray and chill for another 30 minutes before serving.
Cooking lesson I learned: I used to overcomplicate my No-Bake Red Velvet Snowball Truffles by adding too many extras, but turns out simpler is better for that smooth, classic taste. While your truffles are chilling, take a moment to enjoy the process or catch up with your favorite podcast.
How I Love to Serve This!
After making these No-Bake Red Velvet Snowball Truffles, I love pairing them with a simple cup of coffee or warming chai—the creamy richness balances the warm spices so nicely. They also make a sweet addition to holiday dessert tables or just a festive treat to share with friends.
Simple side ideas? A few fresh berries or a handful of nuts make a nice contrast without overwhelming the truffles. These easy holiday truffles are perfect for a casual weekend snack or a last-minute dessert when hosting.
Presentation tip: Arrange them in a pretty bowl dusted lightly with extra powdered sugar or even on mini cupcake wrappers for a fun look. Trust me, friends and family often ask for these again—they’re always a hit!
One December, I tried rolling mine in chopped pistachios instead of powdered sugar. It was a colorful twist that worked really well for a seasonal variation. For more ideas on no-bake treats, you might enjoy browsing this collection of no-bake Christmas ball recipes for inspiration or Lord Byron’s Kitchen’s 25 Christmas Ball and Truffle Recipes for added holiday flair.
Common Questions Answered
Here’s the real-talk part about No-Bake Red Velvet Snowball Truffles that fellow home cooks often ask me:
- Can I make this No-Bake Red Velvet Snowball Truffles ahead for meal prep?
Absolutely! I usually make mine a day or two ahead—it helps flavors meld, and they keep well in the fridge. Just store them in an airtight container to keep them fresh. - What if I don’t have all the ingredients for this No-Bake Red Velvet Snowball Truffles?
No worries. For example, if you don’t have red velvet cake crumbs, try crushed red velvet cookies or make a quick mix combining crushed plain cake crumbs with some cocoa powder and a touch of red food coloring. This flexibility keeps it practical. - How can I adjust the flavor of this No-Bake Red Velvet Snowball Truffles to my taste?
Try adding a pinch of cinnamon or a drop of almond extract instead of vanilla for a fun twist. Or roll them in shredded coconut for extra texture—it’s a simple swap that brings a new vibe. - Are these snowball truffles suitable for kids?
Totally! They’re soft, sweet, and bite-sized, making them a kid-friendly way to enjoy a classic dessert. Just be sure to use food coloring that’s dye-safe for little ones. - What’s the best way to store leftover No-Bake Red Velvet Snowball Truffles?
Keep them in the fridge, covered tightly. They last well for about a week but honestly, they rarely last that long in my kitchen! - Can I freeze these No-Bake Red Velvet Snowball Truffles?
I’ve done it! Freeze them on a tray first, then transfer to a freezer bag. Thaw in the fridge before serving. It’s a handy tip for extra batch-making sessions. - Can I make them vegan?
While I haven’t tested a fully vegan version, swapping cream cheese for a plant-based alternative and using a suitable cake base could work. If you try, I’d love to hear how it goes!
If you’re hunting for quick, 3-ingredient coconut truffle recipes or other easy no-bake truffles, I found a great spot here that keeps it super simple.
Final Thoughts
These No-Bake Red Velvet Snowball Truffles hold a special place in my kitchen because they remind me to keep things simple and nourishing without stress. They’re a little celebration in a bite, creamy and sweet, yet easy enough to fit into my everyday life.
- Use softened cream cheese for the smoothest truffles.
- Chill the mixture before rolling—makes shaping a breeze.
- Powdered sugar coating is key for the snowball look and texture.
For variations, I’ve tried: rolling in chopped nuts, swapping vanilla for almond extract, and even dipping in melted white chocolate for an extra treat. But I keep coming back to the classic powdered sugar version—it’s comfort-food simple.
I hope these red velvet dessert balls inspire you to find your own easy, nourishing sweet spot. Remember, cooking is about joy, not perfection. Make this No-Bake Red Velvet Snowball Truffles your own and enjoy every bite.
If you want more red velvet inspiration, try this Red Velvet Cream Cheese Bundt Cake I adore—it’s another simple, flavorful way to feel good about dessert.
Happy cooking, fellow home cooks! You’ve got this.
No-Bake Red Velvet Snowball Truffles

Delight in these no-bake red velvet snowball truffles, a creamy and festive treat perfect for holidays or any special occasion. These easy-to-make truffles combine rich cream cheese with classic red velvet flavors, coated in powdered sugar for a snowy finish.
- Prep Time: 15 minutes
- Cook Time: 0 minutes
- Total Time: 1 hour 45 minutes
- Yield: 24 truffles
- Category: Dessert
- Method: No-Cook
- Cuisine: American
Ingredients
- 1 box (16 oz) red velvet cake mix
- 8 oz cream cheese, softened
- 1/2 cup unsalted butter, softened
- 2 cups powdered sugar, divided
- 1 teaspoon vanilla extract
- Extra powdered sugar, for rolling
Instructions
- In a large mixing bowl, combine the red velvet cake mix, softened cream cheese, butter, 1 1/2 cups powdered sugar, and vanilla extract.
- Using a hand mixer or stand mixer, beat the mixture until smooth and well combined.
- Cover the mixture and refrigerate for at least 1 hour to firm up.
- Once chilled, scoop tablespoon-sized portions and roll them into balls using your hands.
- Roll each ball in the remaining powdered sugar until fully coated to create the snowball effect.
- Place the truffles on a lined baking sheet and refrigerate for another 30 minutes before serving.
Notes
For an extra festive touch, drizzle melted white chocolate over the truffles before serving or add a pinch of cinnamon to the powdered sugar coating.